• Home
  • About
  • Contact
  • Categories
    • Dear Diary
    • Food for Thought
    • In my Closet
    • The Makeup Geek
    • Wanderlust Traveler
  • Shop

Blushing Sneakerhead – by Mariah Christhel

Facebook Instagram Twitter Google Bloglovin'
Makeup Tutorial by ayacheei ft. Easy Holiday Makeup Look (Natural Glow)
The holidays is one of the busiest time of the year — the season filled with parties and get-togethers, shopping sprees and preps here and there. But along that, it is also the most wonderful time of the year. We get to spend time with our loved ones and enjoy each other's companies in the festivities. And as the celebrations pile up, most of us have lesser time to prioritize ourselves. So on today's blog, I am sharing with you my easy, go-to makeup look for the holidays. It is not the typical red lips and smokey-eyed makeup look rather a natural, cheeky glow look. Think blush and subtle nude lips to brighten up the skin. And I know what you're thinking, this post is days too late for the Christmas holiday, but hey! The New Year is still coming up, as well as the year-end parties and gatherings. So if you're into this type of makeup look, please keep on reading.
Etude House Wonder Pore Freshner and Clean & Clear Essentials Moisturizer
 1.
TONER AND MOISTURIZER
First, you need to prepare your face using a toner. The toner balances your skin's natural pH, as well as removing the extra dirt left after washing your face. I am using the Etude House Wonder Pore Freshner. Then, you also need to put on some moisturizer to hydrate your face (especially in this cold weather which dries up the face). I am using the Clean & Clear Essentials Moisturizer.
Maybelline Baby Skin Pore Eraser , Revlon ColorStay Foundation in the shade 150 "Buff" and Maybelline Dream Satin Skin Foundation in the shade 01
2.
PRIMER AND FOUNDATION
Time for the makeup! To keep it all in tact throughout the day of fun, you need to use a primer. I am using the Maybelline New York Baby Skin Pore Eraser. After that settles in on the skin, you can now put on the foundation. I am mixing together the Maybelline New York Dream Satin Skin Foundation in the shade 01 and the Revlon Colorstay Foundation in the shade 150 "Buff" for that glow look I want while making sure it will stay on at the same time. I just blend it on my face using my Zoeva 104 Buffer Brush. You can also use a blender for easier application.
the SAEM Cover Perfection Tip Concealer and Johnsons Baby Powder
3.
CONCEALER AND POWDER
Next, I put light concealer under my eyes. I am using the SAEM Cover Perfection Tip Concealer. I blended it in with my ring finger. Next, I just set everything in using a powder. I am using the Johnson's Baby Powder.
Benefit Browvo Conditioning Primer , Benefit Precisely My Brow Pencil in the shade 05 and Benefit 3D Browtones in the shade 2

4.

EYEBROWS
For the brows, I actually used a lot of products haha! First, I prime my brows using the Benefit Cosmetics Browvo Conditioning Primer. Next, I fill it up using the Benefit Cosmetics Precisely My Brow Pencil in the shade 5 and for a natural look, I just brushed it off afterwards. And lastly, I finish my brows with the Benefit Cosmetics 3D Browtones in the shade 2 to keep my brows in place for the day.

Loreal False Lash Miss Manga Mascara
5. 
MASCARA
For the lashes, I just lightly curled it and applied the mascara. I am using the Loreal Paris False Lash Miss Manga Mascara.
Benefit Benetint and Etude House Cookie Blusher in the shade 6 "Grapefruit Jelly"
6.
BLUSH 
Once my foundation had completely set, I then go back to the face makeup. First, I put on the cheek stain and I am using the Benefit Cosmetics Benetint. I apply small amounts on the apple of my cheeks and I just feather it out up to the temples. And then, I put on the blush powder. I am using the Etude House Cookie Blusher in the shade 6 "Grapefruit Jelly". I just applied it in the same positions as the cheek stain using the puff. 
Maybelline Master Strobing Cream
7. 
HIGHLIGHT
Next, I put on the liquid highlighter on the highest point of my cheekbones and on my cupid's bow. I am using the Maybelline New York Master Strobing Cream in the shade pink. I just blend it in again using my ring finger.
Burt's Bees Lip Balm and Mac Pressed and Ready Lipstick (Lustre)
8.
LIP BALM AND LIPSTICK
And to finish of my look, I put on lip balm first to moisturize my lips, and then add some color with a nude lipstick. I am using the Burt's Bees Lip Balm "Wild Cherry" and the Mac Lipstick "Pressed and Ready" (Lustre).
9.
SET
Lastly, I set my whole face using a setting spray. I am using the Holika Holika Face Conditioner Long-Lasting Makeup Fixer.
Makeup Tutorial by ayacheei ft. Easy Holiday Makeup Look (Natural Glow)
And here's the final look, a different take on the traditonal holiday makeup look! 
I hope you guys enjoyed this tutorial and have a happy holiday ahead!


Share
Tweet
Pin
Share
10 comments
Makeup Tutorial by ayacheei ft. The Hangover Drunk Blush Makeup Look
Hi guys! It's been a while. On today's blog, I'll be showing you an easy way of recreating the "drunk blush" makeup look or as I like to call it, the "hangover" makeup look. This look was popularized by Japanese makeup artist Igari Shinobu and had been showcased by various artists like Nadine Lustre and Andrea Brillantes.
The "hangover" makeup look mainly focuses on the blush—applying the right amount of blush under the eyes and over the nose, creating a continuous redness. This way, you'll be able to mimic one's flushed skin via drinking alcohol or a weather too cold. I think this look is appropriate in today's time since Christmas is fast approaching. It is also an easy look to recreate! And I'll be sharing three steps on how to do the "hangover" makeup look. It has been my current go-to makeup because it is that easy to create, especially on the morning rush when all you need is that pop of color. I'm not going to babble anymore, here are the three easy steps on creating the "hangover" makeup look.
1. CHEEK TINT
First, start with a cheek tint. I am using the SkinGenie Lip and Cheek stain in the shade "Tulip Red".
Dab the cheek tint starting from your nose to cheeks, forming a horizontal C shape. Blend using your fingers. Build up the color by adding more tint as desired, and just keep blending.
Etude House Lovely Cookie Blusher in the shade #6 Grapefruit Jelly
 2. POWDER BLUSH
Now, for the powder blush. I am using the Etude House Lovely Cookie Blusher in the shade #6 Grapefruit Jelly.
Apply the layer of the powder blush over the liquid tint (on the cheeks and slightly over the nose). This method is done in order to enhance and prolong the color of the blush.
Detail Makeover Contour&Blush Effects 4-in-1 Palette (Highlighter)
3. HIGHLIGHTER
Next, you'll need a highlighter. I am using the Detail Makeover Contour&Blush Effects 4-in-1 Palette (Highlighter).
For that "natural glow" look, add the highlighter on your cheekbones and the bridge of your nose. A little goes a long way!
Makeup Tutorial by ayacheei ft. The Hangover Drunk Blush Makeup Look
Lastly, do your normal makeup routine and the look is done! An easy way on recreating the "hangover" makeup look.

PRODUCTS USED:
Quick FX No Shine Mattifier
Maybelline Dream Satin Skin Foundation in the shade 01
The SAEM Cover Perfection Tip Concealer Brightener
SkinGenie Lip and Cheek Stain in the shade Tulip Red
Etude House Lovely Cookie Blusher in the shade #6 Grapefruit Jelly
Detail Makeover Contour&Blush Effects 4-in-1 -Highlighter
Benefit Browvo! Conditioning Primer
Maybelline Fashion Brow 3D Brow & Nose Palette in the shade Dark Brown
Maybelline Lash Sensational Waterproof Mascara
Maybelline The PowderMattes in the shade Barely There


Share
Tweet
Pin
Share
2 comments
Makeup by ayacheei ft. Rucy's Vanity PH
"Kinain ka na ba ng sistema?" If you are a huge K-Pop fan, your friends probably asked you that question too many times already. But I mean common! What's not to love about K-Pop right? I, myself, am a huge K-Pop fan and one thing that I enjoyed while joining the fandom is the chance I had on exploring the world of K-Pop — not just music but K-Dramas, K-Fashion and K-Beauty as well. This is the main reason why K-Beauty really captured my heart. From watching K-Dramas and mvs, I have always been amazed on how Koreans achieve these distinctive looks although some of them probably look the same. And as many of my fellow Filipinos admire the craft as much as I do, many Korean cosmetics company made it easier for us to purchase these eye candies. One of my personal favorites is Etude House just because Etude House brings out the inner princess in me. Kidding aside (but it's kinda true too), I fell in love with Etude House because I have tried and tested their products too many times already and it is really good (especially the Wonder Pore). But due to the world wide web, other Korean cosmetics company compete with famous brands like Etude House. A brand that caught my eye recently is Rucy's Vanity (PH).
Makeup by ayacheei ft. Rucy's Vanity PH
Rucy's Vanity was founded in 2007 by Derm Plus Trading, Inc. The company aims to become one of the best distributor and importer of Korean cosmetics line in the country. Rucy's Vanity offers a wide range of high quality, 100% korean cosmetics and skin care for both men and women, in a reasonable price. All products sold by the brand are certified by the Korean Food and Drug Administration and Philippine Food and Drug Administration (FDA).
Makeup by ayacheei ft. Rucy's Vanity PH
Thanks to Rucy's Vanity, I recreated a look inspired by my favorite Korean girl group, Girls Generation. They are one of the first girl groups I really admired because I just love their personal style, not to mention they are always so pink and cute, which I kinda am back in the day.
First, I prepped my skin using the Rucy's Vanity Foam Cleansing Green Tea (130 pesos), COSRX One Step Pimple Clear Pad and Clean and Clear Moisturizer. As a base, I used the Quick FX No Shine Mattifier. To achieve that dewy skin, I used the Maybelline Super BB Mineral Guard Filter in the shade 01. For the eyeshadow, I used the Etude House Fantastic Color Eyes Bloody Halloween Palette. Then for the eye brows, I used the eb Advance Brow Palette. And to tame my brows, I just used the Maybelline Fashion Brow Mascara in the shade dark brown. I tried to shape them as straight as I possibly can since most Korean girls have naturally straight brows. I, on the other hand, have naturally arched brows so it was quite hard for me in doing so.
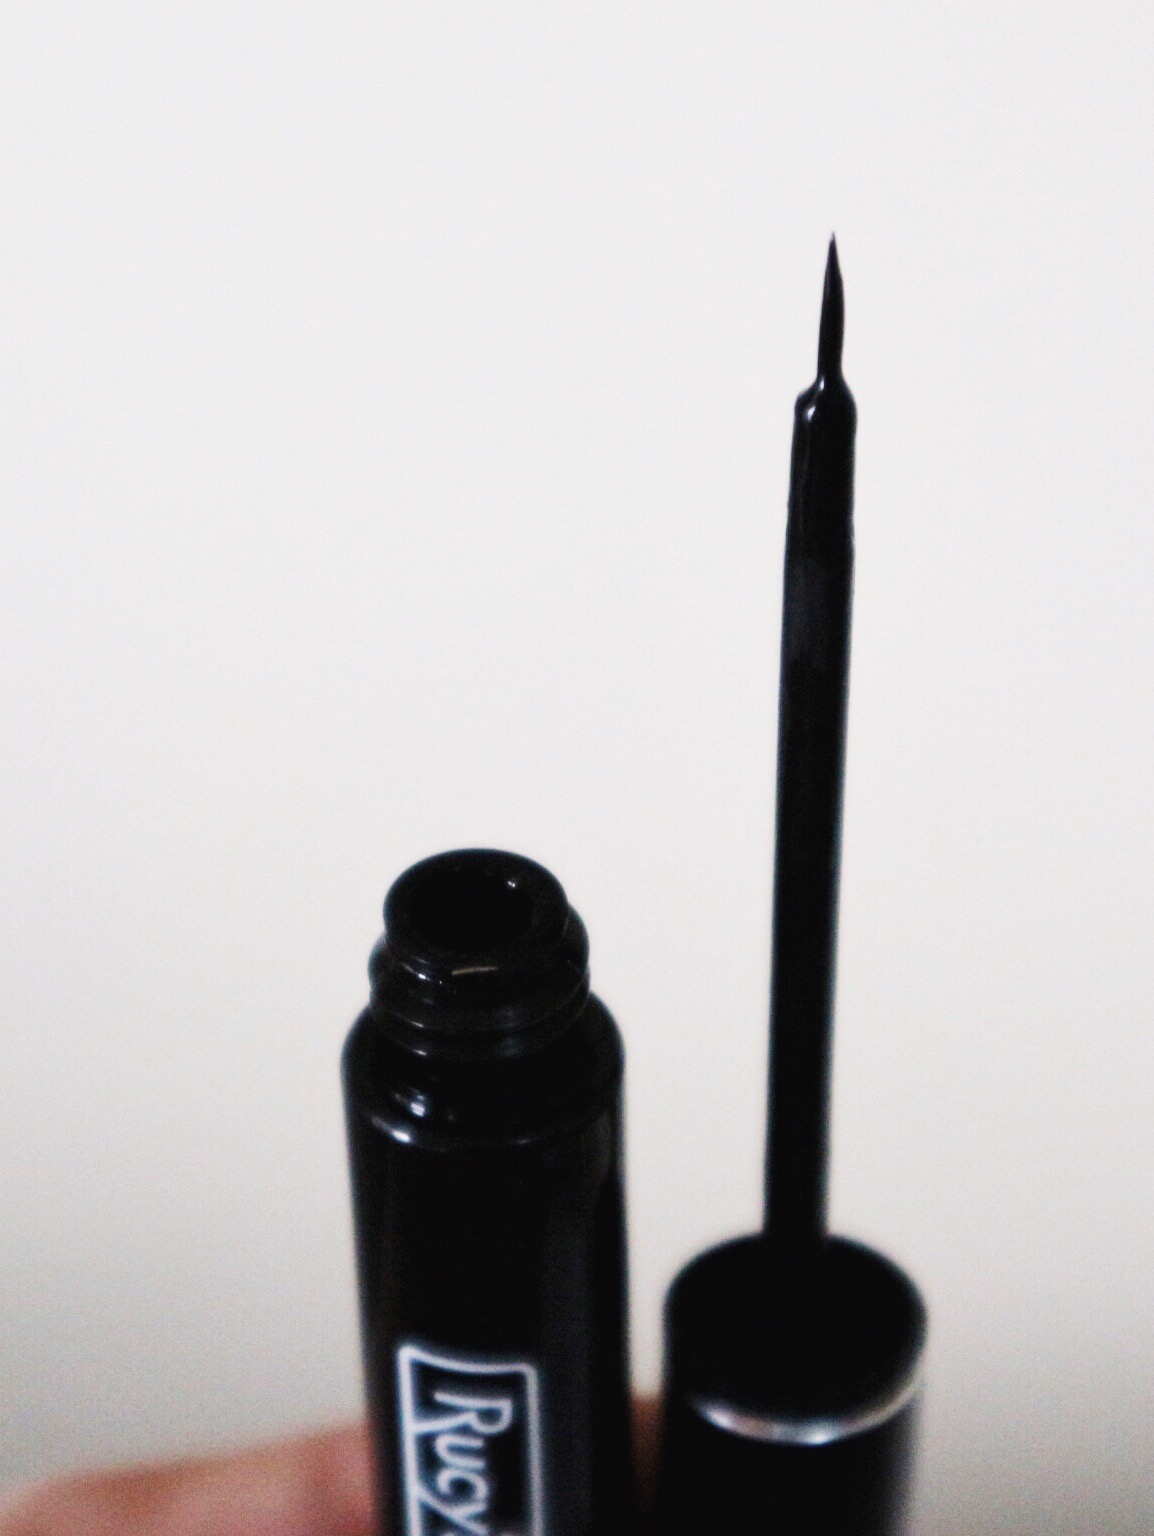
Rucy's Vanity PH Eye Liner
Afterwards, I applied the Rucy's Vanity Liquid Eyeliner (160 pesos) on my lids. Since I have hooded eyes and thick, long lashes, I tried to put the eye liner as close to my lid as possible so that it wouldn't appear to harsh on my eyes.
Rucy's Vanity PH Mascara
For the mascara, I used the Rucy's Vanity Gleamy Lavish Waterproof Mascara (180 pesos). This is my favorite product from Rucy's Vanity because it maintains my lashes curled up all day while keeping it natural. 
Rucy's Vanity PH Lip & Cheek Red
Next, I applied the Rucy's Vanity Lip & Cheek Red (80 pesos) on my cheeks and lips (Tip: A little amount of the product goes a long way). Then, I contoured my face using the Detail Makeup Contour & Blush Palette.
Rucy's Vanity PH Two way cake powder
I finished the look by adding a bit of the Rucy's Vanity Two Way Cake (250 pesos).
Makeup by ayacheei ft. Rucy's Vanity PH
Here is the final look! Can I pass off as a Korean? (Pero feeling ko talaga ombre lips ang nagdala *pats self*)
To know more about the products I used from Rucy's Vanity PH and buy these products, visit their website www.rucysvanitph.com. You can also check their Instagram account www.instagram.com/rucysvanityph for updates.


Share
Tweet
Pin
Share
4 comments


Makeup Tutorial by ayacheei ft. Bronze Goddess Makeup
Hello everyone! Today, we're about to recreate the famous bronze Goddess look. This classic makeup will never go out of style since it can be worn on an everyday basis or even at parties and special occasions. I’m in love with it since it gives me that smitten vibes I like, perfect for the day and hot summer evenings. You don’t have to go overboard with very dark eye shadows to create this look. The finished look maybe intense depending on how you do your eyes, but at the end of the day, what matters is that bronzy glow that everyone is wanting.
Makeup Tutorial by ayacheei ft. Bronze Goddess Makeup
This version I am wearing right now is done by my sister (She really loves makeup! You can subscribe to her channel: youtube.com/YzabelleProvido). Check out the photos below on how to achieve this bronze goddess look.
Makeup Tutorial by ayacheei ft. Bronze Goddess Makeup
1.
BARE FACE
First, wash your face so that you’ll start off with a clean canvass. I am using NIVEA extra white pore minimizer scrub.
2.
BASE
Apply a light layer of the foundation. I am using the Maybelline Dream Satin Skin B4. Buff it onto your face by using a blush brush. If you don’t have any, using your hands will do.
3.
CONCEAL
First step in contouring is that you should base it. I am using L.A. Girl Pro Conceal. Apply it to the forehead, temples and cheekbones.
4.
POWDER PUFF
Powder areas like your forehead, around the nose, under the eyes and next to the corners of your mouth. I am using the Maybelline White Superfresh 03.
Makeup Tutorial by ayacheei ft. Bronze Goddess Makeup
5.
BRONZE
Dust off your bronzer onto the cheeks, forehead and jawline. I am using the bronzer from Ever Bilena.
6.
BRUSH UP
Groom your brows upward. I am using the Maybelline Fashion Brow (darkest shade).
7.
EYE MAKEUP FOR LONG
Apply primer so that your eye makeup will last longer. I am using the Essence eyelid primer.

Makeup Tutorial by ayacheei ft. Bronze Goddess Makeup
8.
SMOKEY FOR THE LIDS
Smokey shadow for the eyes! I am using the makeup from Sleek with the shades Ultra Mattes V2 Darks 731 and Vintage Romance 141. (A) Apply the “flesh” color for the transition. (B) Define the crease by using the “maple” shade. (C)To create a halo effect, apply the “paper bag” shade in the inner and outer corners. (D) To finish of that smokey eye look, dab in “meet in Madrid” at the center of the lids for a pop of color.
Makeup Tutorial by ayacheei ft. Bronze Goddess Makeup
9.
LASHES FOR LONG
Curl your lashes. You can also add falsies if you like. Apply the mascara for beautiful lashes. I am using the Maybelline Lash Sensational.
10.
NATURAL LIPS
Line the lips with a natural lip liner. I am using the True Lips Menow. To finish of the look, apply nude lipstick. I am using the lip cream from Essence.

Makeup Tutorial by ayacheei ft. Bronze Goddess Makeup


Makeup Tutorial by ayacheei ft. Bronze Goddess Makeup
Here is the final look. Whether you are morena or mestiza like me, this trend can still be perfect for all. The eyes have that orangey ombre color which I adore. I also love how that brownish matte color bronzer makes my cheeks and my whole face shine. hehe.
I hoped you enjoy the tutorial! Thank you so much for the read!:)


PRODUCTS USED:
NIVEA Extra White Pore Minimizer Scrub
Maybelline Dream Satin Skin B4
L.A. Girl Pro Conceal
Maybelline White Superfresh 03
Ever Bilena Bronzer
Maybelline Fashion Brow
Essence Eye Lid Primer
Sleek Ultra Mattes V2 Darks 731
Sleek Vintage Romance 141
Maybelline Lash Sensational
True Lips Menow
Essence Lip Cream
Share
Tweet
Pin
Share
2 comments
Hair Tutorial by ayacheei
Loose waves are one of the hottest hair trend out there at the moment. It can be seen seen in different runway shows like Tresemme Runway Ready, Anna Sui, Victoria’s Secret Fashion Show and BCBG Max Azriashow. Many celebs also pull off this look since it can be worn even if you have short hair or long. It doesn't matter, actually. 
From left to right, up to down: © Popular Long Hairstyle Idea, Lucy Hale, Jennifer Lawrence, Sherri Hill
Recreating this look doesn’t require much skill or time either. With the use of the right wand, you can easily pull off this look. These pretty waves allow imperfections to give that romantic kind of feel to it. I loved this hairstyle because I feel that this soothes my hair length. It can be worn casually or even at formal events since it can give you that certain femininity. Here is how to get this trendy hairstyle.
Hair Tutorial by ayacheei ft. beach waves
  • 1)       On dry hair, brush off any tangles.
  • 2)       Set your curler on desired temperature and wait for it to heat up. (I am using Vodana Professional, 40mm). It is a must to use a thick-rod curler to give you those loose curls you want.
  • 3)       Put your hair in sections and start in the back.
  • 4)       Take an inch strand of hair and start curling. To get the perfect s-curls, curl your hair from its mid part up to the end of the strand. But if you have a short hair like mine, start at the mid part but do not curl it at the end.
  • 5)       Do #4 on each hair section.
  • 6)       Once it’s finished, it should look like this.
  • 7)       Smooth the curls by combing it out.
  • 8)       Finish the look with a sea salt spray (I used a DIY, but you can purchase it at any local drug stores) to make the look last longer.
Hair Tutorial by ayacheei ft. beach waves
Here is the final look! This hairstyle is adored by many since it can be worn from the red carpet to the everyday beauty lover. If you want DIY on how to make the seasalt spray, I would post it later on.:)


Share
Tweet
Pin
Share
2 comments
Older Posts

ABOUT THE BLOG

image1-7


Blushing Sneakerhead by Mariah Christhel is a personal blog that records stylish and comfy #ootds as well as beauty, food, travel and anything oh random.


MY LOVELY READERS

MUST READS

  • THE HOTTEST BUFFALO WINGS AT BUFFALO'S WINGS N' THINGS SM CITY SAN PABLO
  • MY NEW HOLY GRAIL SKINCARE | KLAIRS FRESHLY JUICED VITAMIN DROP BY WISHTREND
  • SOLA ICED TEA IN A WHOLE NEW PERSPECTIVE
  • MY FIRST SHOPPING EXPERIENCE AT SEPHORA PHILIPPINES

Created with by BeautyTemplates